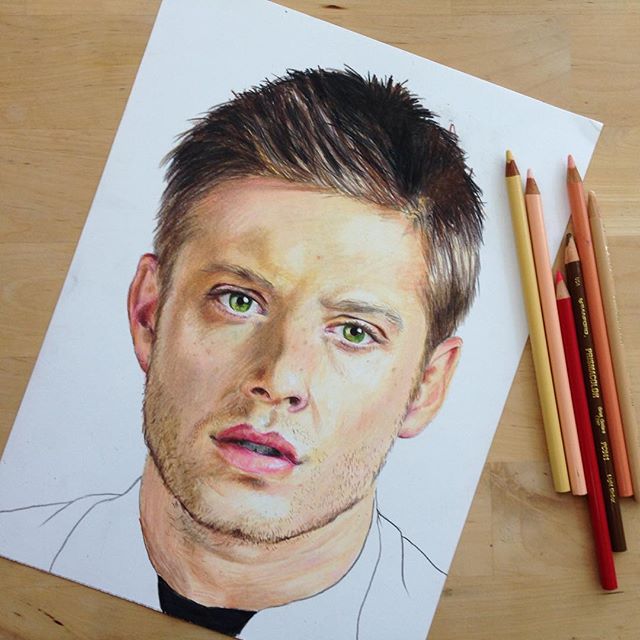
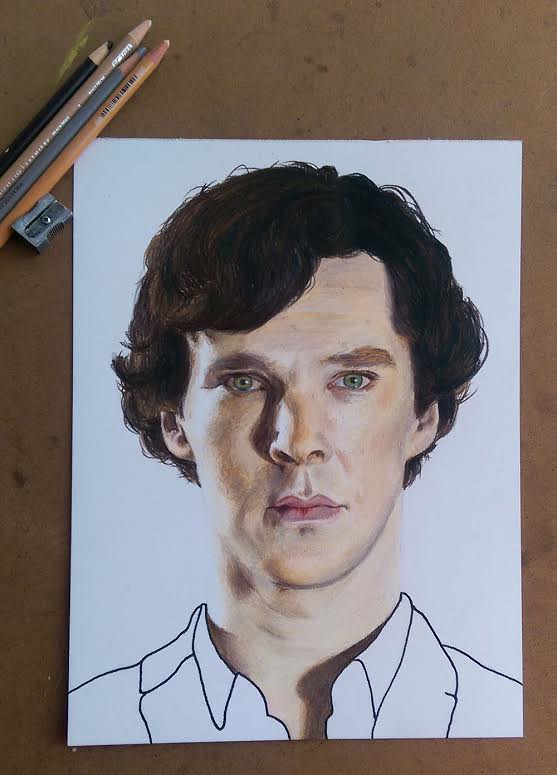
My daughter always draws some portraits of popular actors as their popular characters for her friends. It never occurred to her that I may want it too! So for my birthday I asked for a portrait of any of my favorite character. And finally I have it! Neal Caffrey from the White Collar series!
There are three of her recent portraits:
Jensen Ackles from Supernatural. I didn't watch it but I love his green eyes and boyish charm!
This was a present for me - Neal Caffrey from the White Collar.
Everybody loves his inquisitive mind and rich voice:) Elementary - it's Holmes!
Three days till tomorrow
Friday, January 29, 2016
Friday, October 16, 2015
New Illustrated Harry Potter and the Sorcerer's Stone
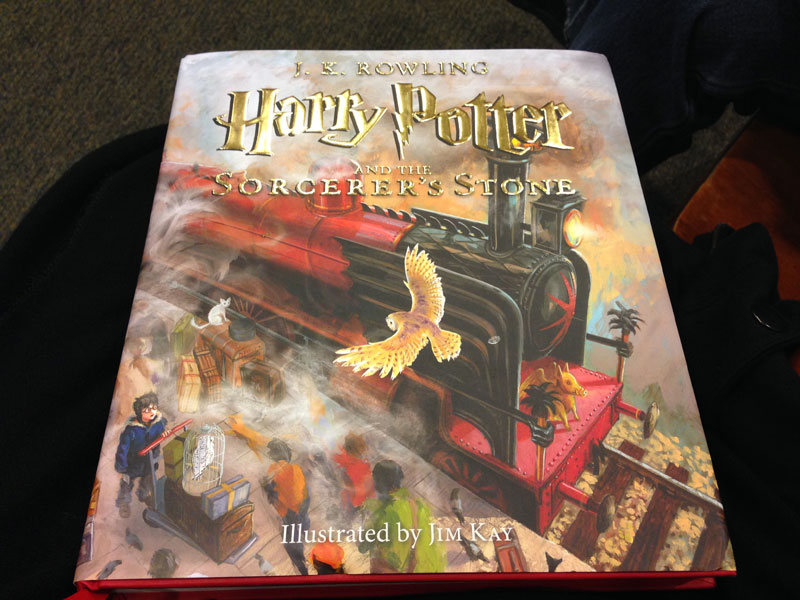
I went to a book store last Friday and noticed on the shelves just at the entrance a new illustrated Harry Potter! It was released just three days ago. With the usual difference in the title - Philosopher's Stone in Britain and Sorcerer's Stone in USA.
Harry Potter and the Sorcerer's Stone: The Illustrated Edition (Harry Potter, Book 1) on Amazon
It is illustrated by the British artist Jim Kay. Currently he is working on the second book about Harry Potter in a lovely little studio where tiny birds come inside easily through a door from a beautiful garden.
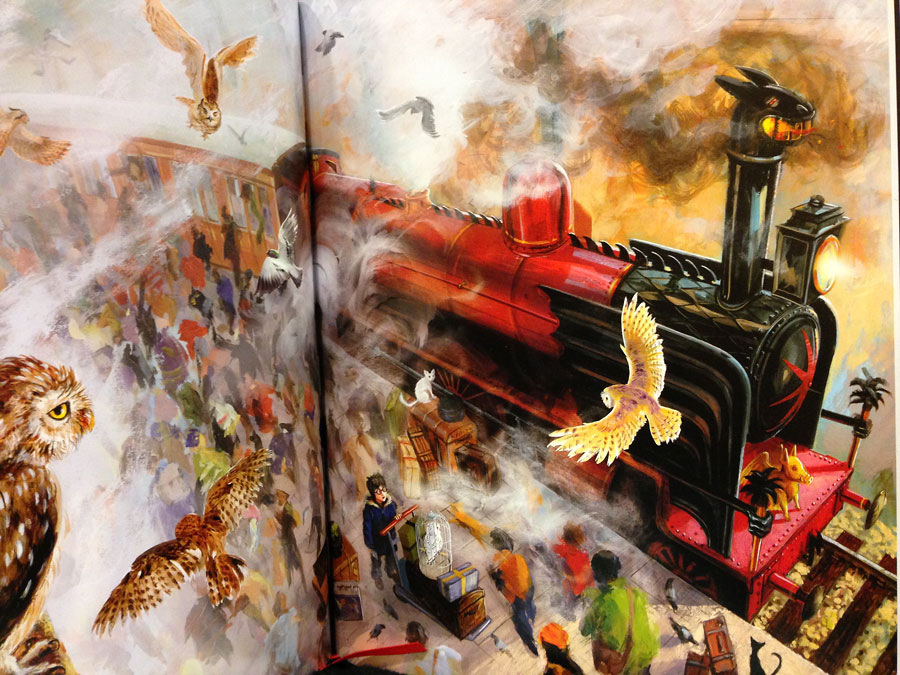
On the cover there is one of the illustrations - Harry arrives at his platform to the Hogwarts Express. The book is rather big, printed on beautiful silky paper and fully illustrated. .
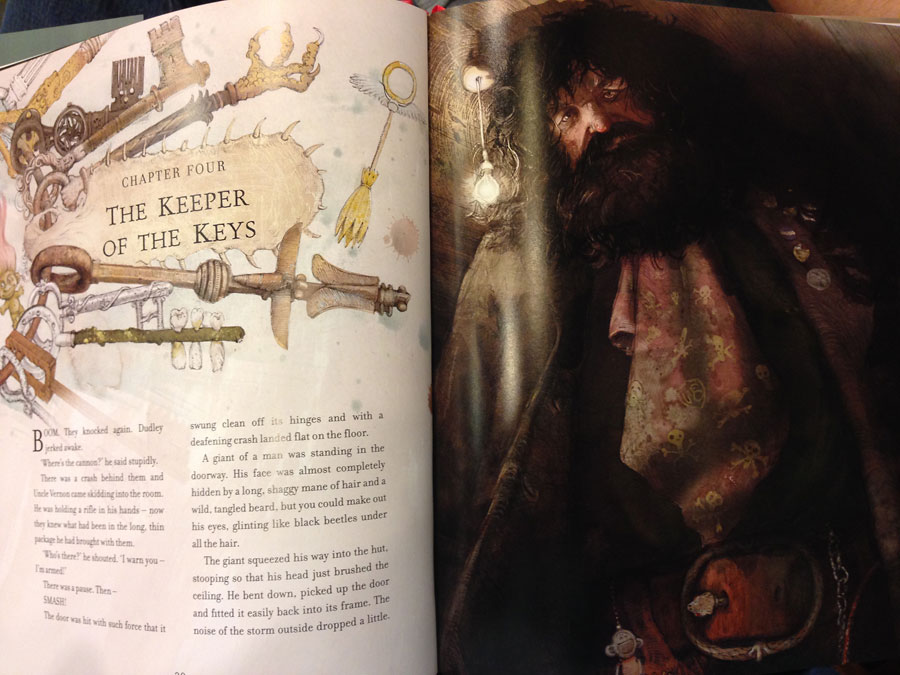
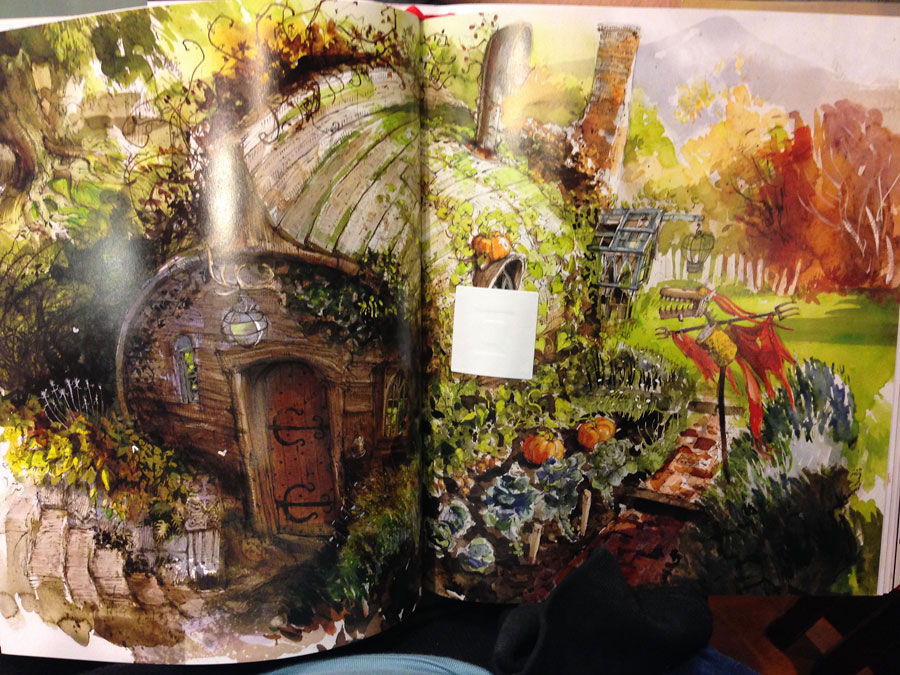
Kay wrote about Hagrid on his site: "Hagrid in the Wooden Shack. My favourite character to illustrate, I have already decided on the badges he wears on his coat (when I was a child the school caretaker used to wear things the children had given him, which gave me the idea). I love illustrating giants. They remind adults like me of being a small child again, a time when everything was hard to reach, and adults were just a forest of legs.".
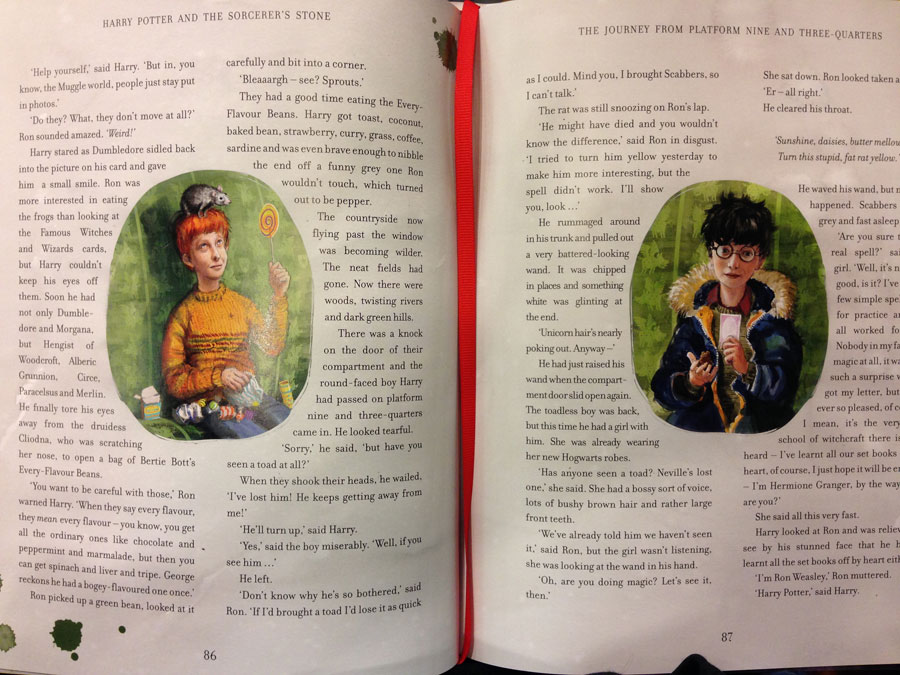
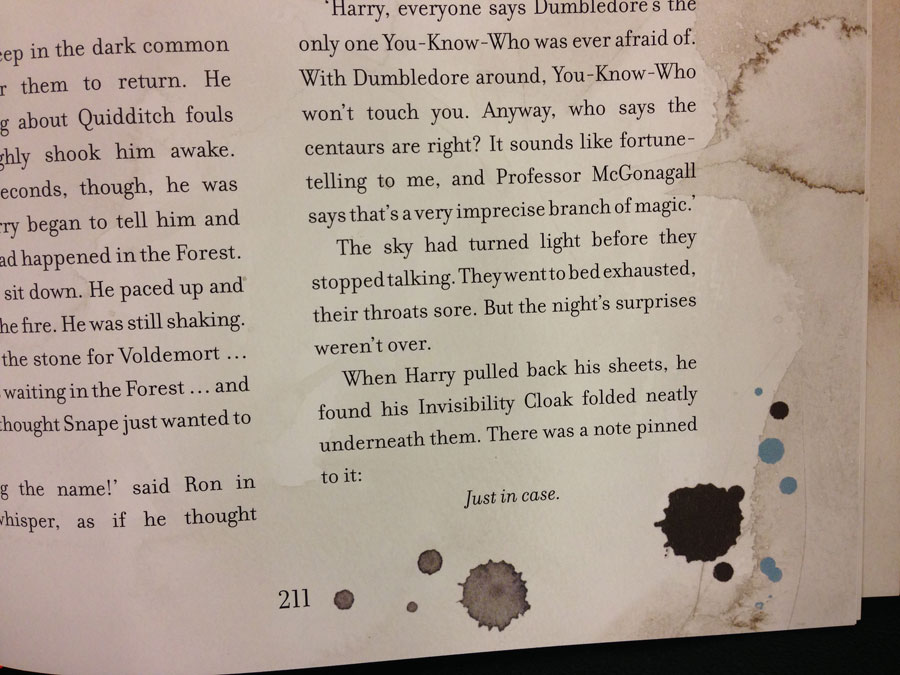
All pages are painted under the text. You can see how the sky on illustration on the right continues in paler tones on the text background on the left.
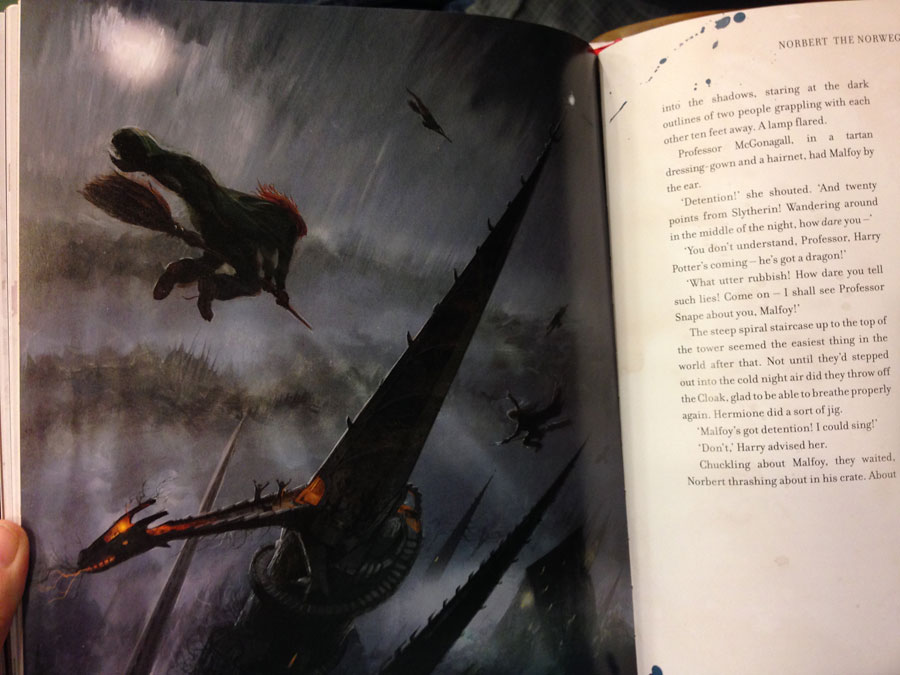
 The illustrations are generously large and look bright on glossy paper. To make Malfoy's appearance creepy the artist drew his eyes perfectly symmetrical.
The book is too big to fit into the frame so I moved camera to the left or to the right to show more important parts. A bright red bookmark is a nice touch.
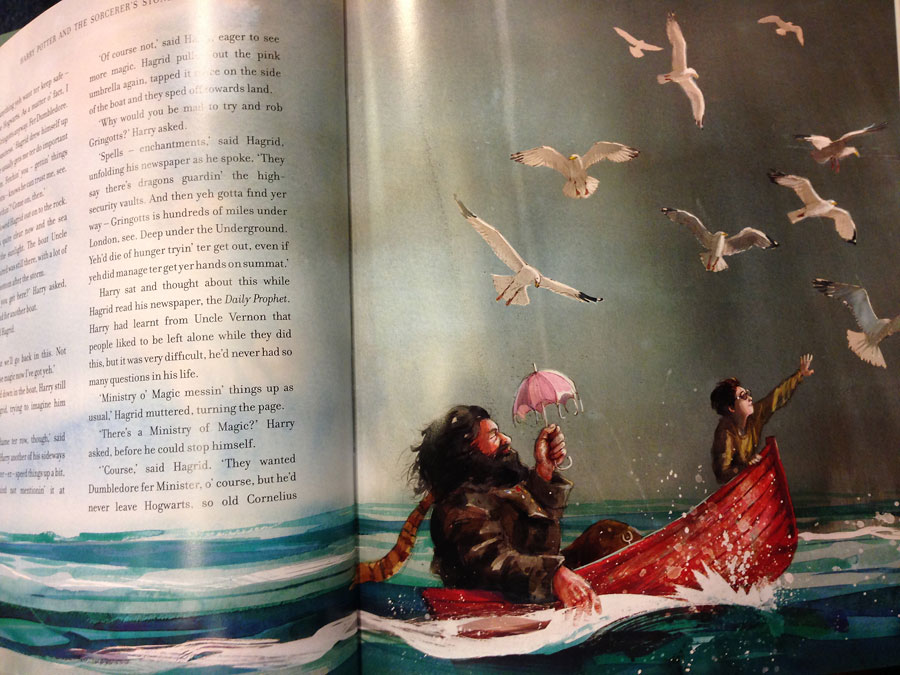
Hagrid used an old boat to make his house.
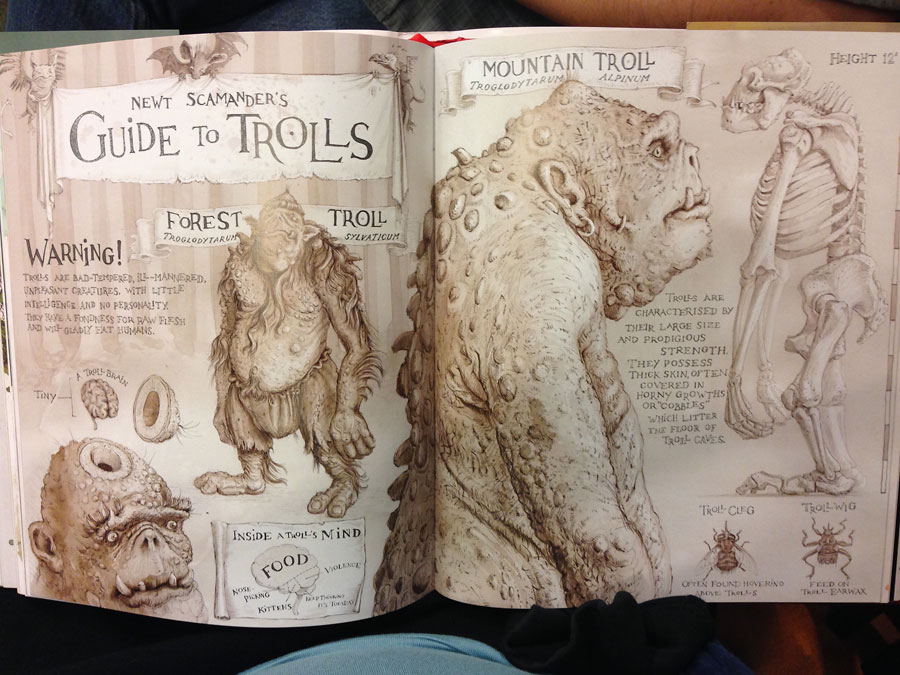
Jim Kay loved to draw books inside the book! Guide to Trolls looks authentic:)
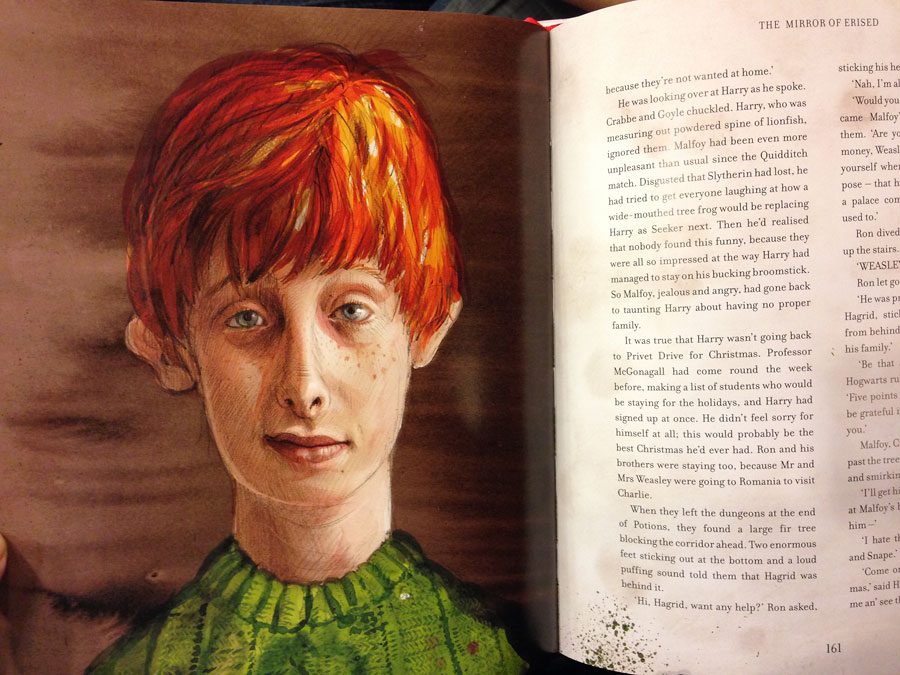
Ron is completely "normal" - there is nothing symmetrical in his face!
Jim Kay made models for some parts of illustrations - like these dragon towers - to see how they look at different angles.
Four friends
All pages are colored - pale watercolor washes, spots and splashes.
Hogwarts Express. The illustrator made its paper model too!
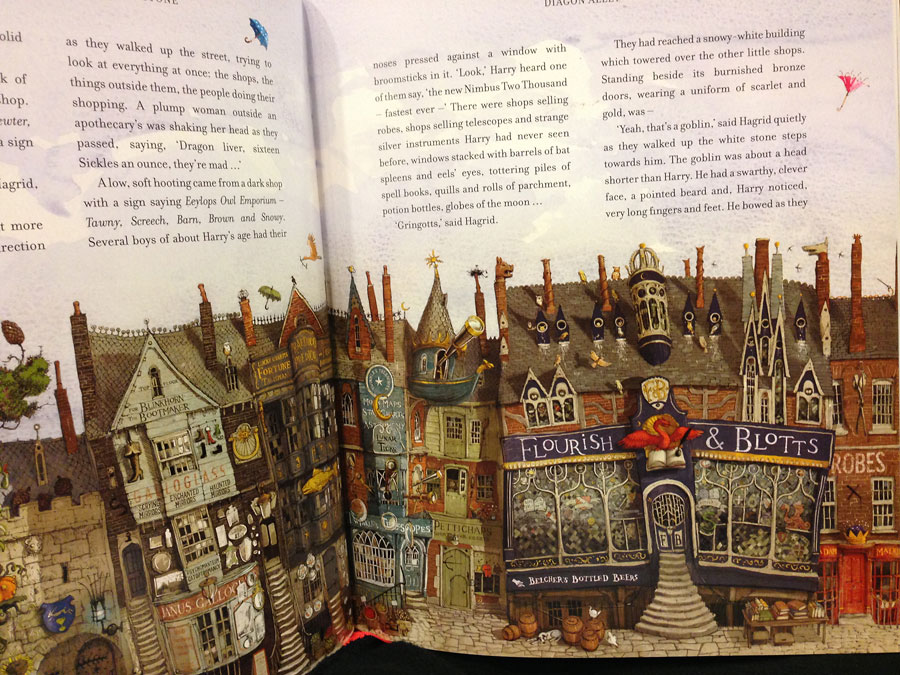
Diagon Alley - meticulously planned and drawn.
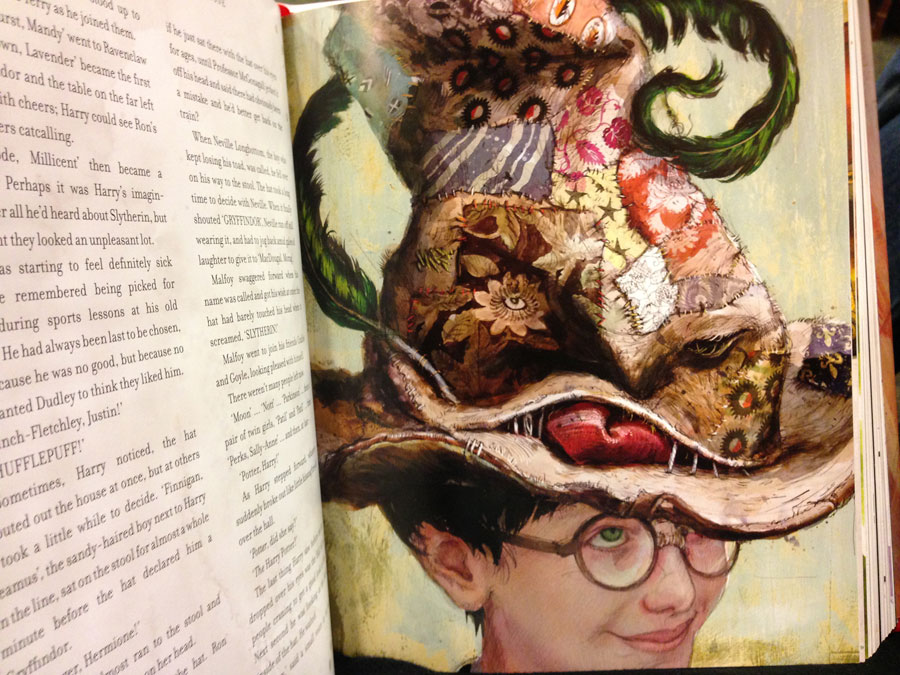
The Sorting Hat. Do you see a face on it?
Here Jim Kay is writing about creating these beautiful illustrations. There are about a hundred illustrations in this book.
A lovely video about Jim and his little studio.
The book is exquisite! It will be a perfect gift for a fan or the memorable first Harry Potter for a kid.
Harry Potter and the Sorcerer's Stone: The Illustrated Edition (Harry Potter, Book 1) on Amazon
Harry Potter and the Sorcerer's Stone: The Illustrated Edition (Harry Potter, Book 1) on Amazon
It is illustrated by the British artist Jim Kay. Currently he is working on the second book about Harry Potter in a lovely little studio where tiny birds come inside easily through a door from a beautiful garden.
On the cover there is one of the illustrations - Harry arrives at his platform to the Hogwarts Express. The book is rather big, printed on beautiful silky paper and fully illustrated. .
Kay wrote about Hagrid on his site: "Hagrid in the Wooden Shack. My favourite character to illustrate, I have already decided on the badges he wears on his coat (when I was a child the school caretaker used to wear things the children had given him, which gave me the idea). I love illustrating giants. They remind adults like me of being a small child again, a time when everything was hard to reach, and adults were just a forest of legs.".
All pages are painted under the text. You can see how the sky on illustration on the right continues in paler tones on the text background on the left.
 The illustrations are generously large and look bright on glossy paper. To make Malfoy's appearance creepy the artist drew his eyes perfectly symmetrical.
 The book is too big to fit into the frame so I moved camera to the left or to the right to show more important parts. A bright red bookmark is a nice touch.
Hagrid used an old boat to make his house.
Jim Kay loved to draw books inside the book! Guide to Trolls looks authentic:)
Ron is completely "normal" - there is nothing symmetrical in his face!
Four friends
All pages are colored - pale watercolor washes, spots and splashes.
Hogwarts Express. The illustrator made its paper model too!
Diagon Alley - meticulously planned and drawn.
The Sorting Hat. Do you see a face on it?
Here Jim Kay is writing about creating these beautiful illustrations. There are about a hundred illustrations in this book.
A lovely video about Jim and his little studio.
The book is exquisite! It will be a perfect gift for a fan or the memorable first Harry Potter for a kid.
Harry Potter and the Sorcerer's Stone: The Illustrated Edition (Harry Potter, Book 1) on Amazon
Friday, August 28, 2015
Book sculptures
Saturday, August 9, 2014
Little lace decoration
I bought this recently at a thrift store. It's tiny and delicate, the inner diameter is less than 3 in. At first I thought that it was an embroidered piece but after taking pictures and looking at them on bigger scale I realized that it's a very fine piece of lace made out of thin colored treads. All details are attached to each other with tiny knots. I thought the background to be a cardboard circle but in fact it is a circle of very fine felt. The frame is signed on the back and has a date - '90. So it's somebody's art and is 24 years old!
On the background you can see one sheet from my collection of women's craft and needlework attachments to popular magazine of 19th century.
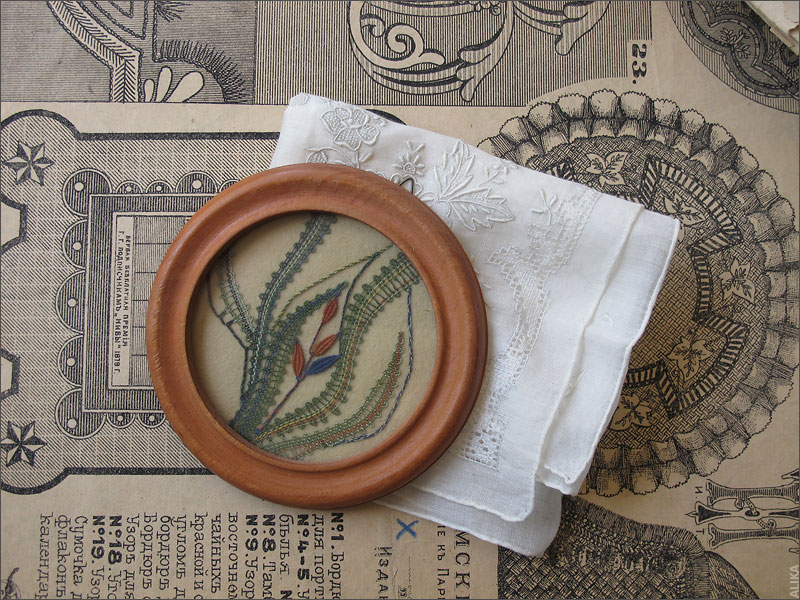
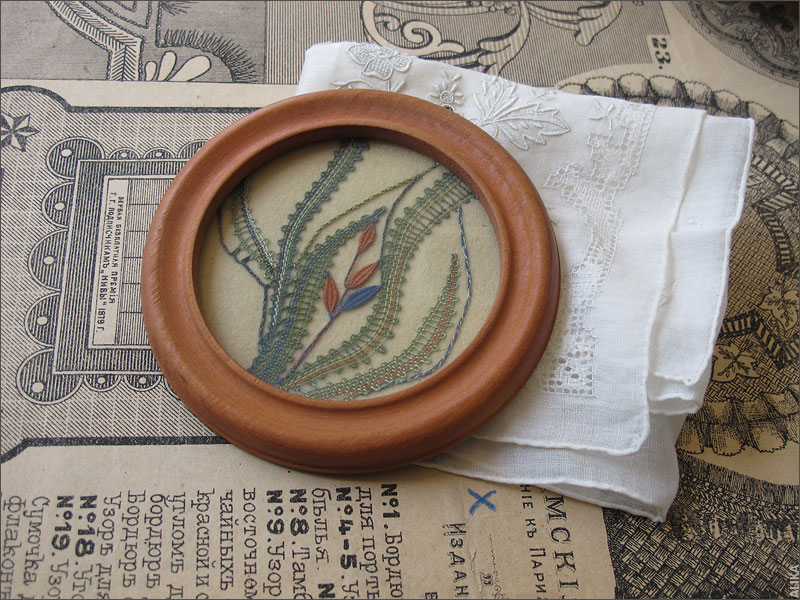
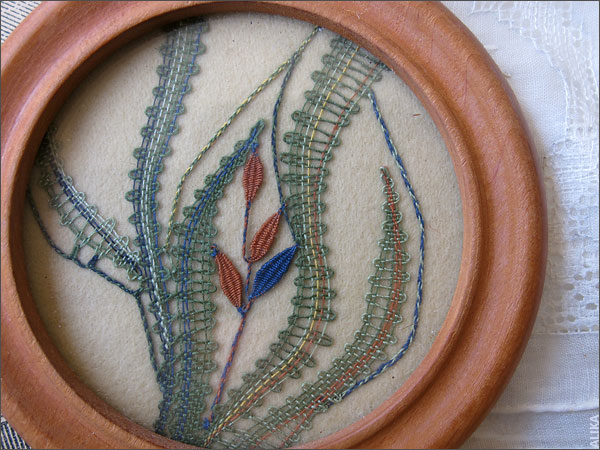
On the background you can see one sheet from my collection of women's craft and needlework attachments to popular magazine of 19th century.


Saturday, June 7, 2014
Black Victorian Necklaces for my Etsy shop
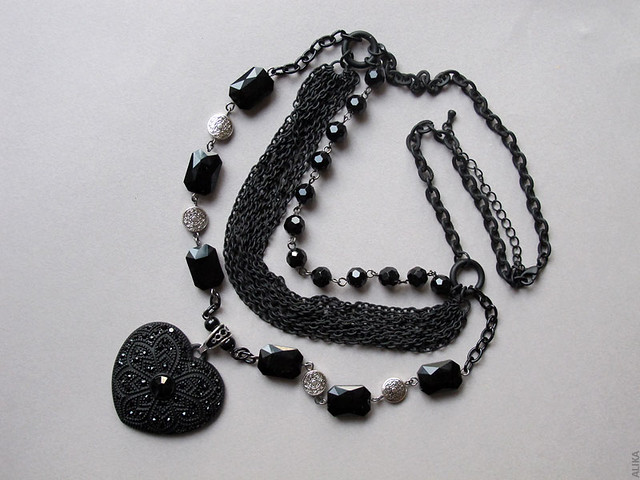
I've made two new Victorian era inspired necklaces - with a heart pendant and a bow pendant.
Get a little tired of Etsy signature white background photos and this time took out my old music pages and ladies magazine dress pattern sheets. Oh, and a delicate embroidered handkerchief that I found an some thrift store. I like that better.
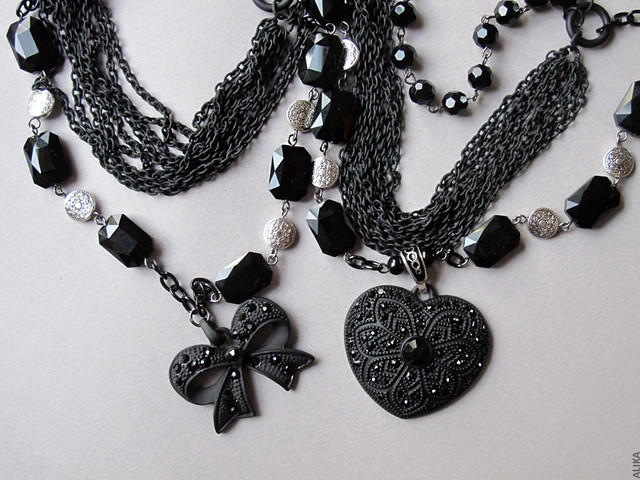
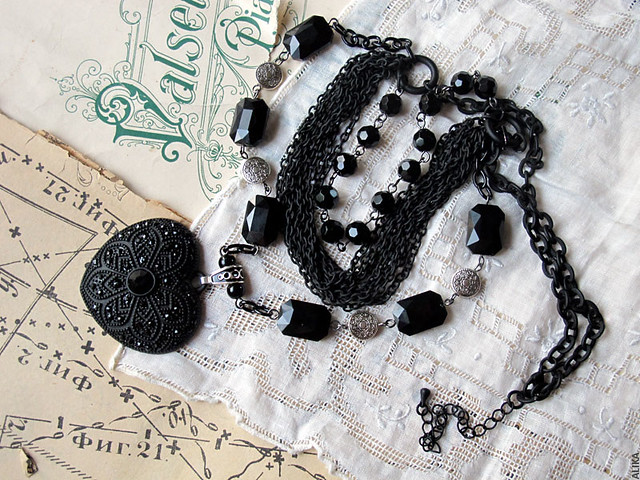
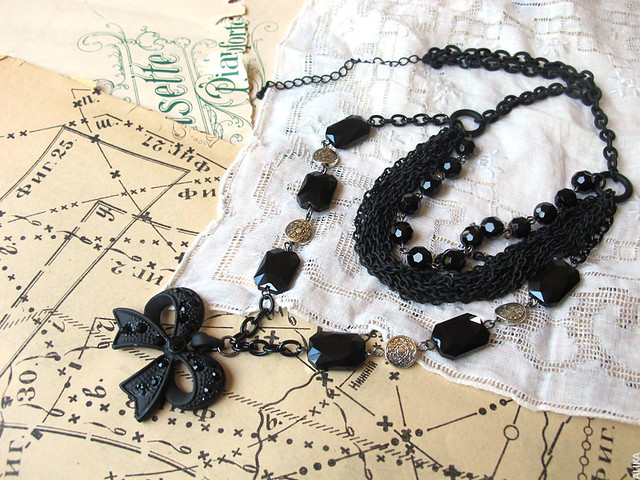
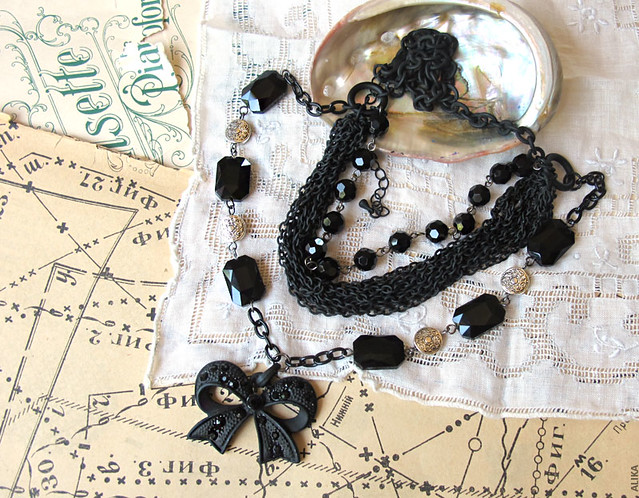
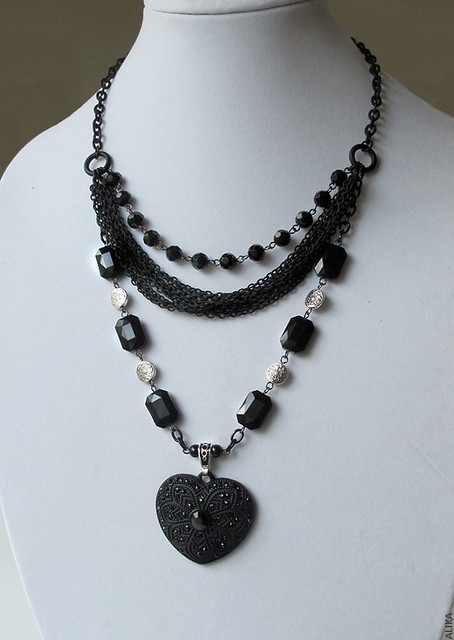
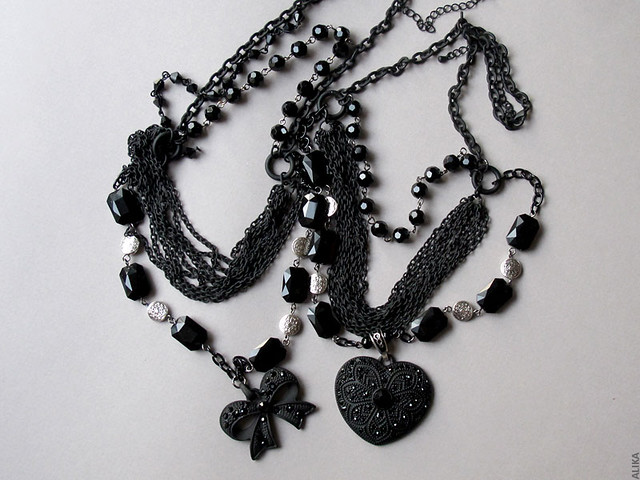
Listing for a Bow Victorian Necklace at my Etsy shop.
Listing for a Heart Victorian Necklace at my Etsy shop.
Get a little tired of Etsy signature white background photos and this time took out my old music pages and ladies magazine dress pattern sheets. Oh, and a delicate embroidered handkerchief that I found an some thrift store. I like that better.


Listing for a Bow Victorian Necklace at my Etsy shop.
Listing for a Heart Victorian Necklace at my Etsy shop.
Sunday, January 12, 2014
Teapot necklaces
I made this necklace for my Etsy store last year. The nice bright color of lampwork beads reminded me of cold and bright winter mornings, so I called it "The Winter Morning Tea". I have one myself and when wear it always have a lot of compliments.
The beginning of this year I devoted to collecting all loose ends and unfinished plans. When I put every thing from my many lists during the past year onto a new fresh list it had 810 items!
I try not to panic and use random number generator to pick at least one item everyday and do it as much as I can. Two days ago it was "To make any of your previously made necklaces in different color". I have my Winter Tea before me and some green small beads which I try to unite with some red ones. An idea came immediately - Green Tea! So I made Green Tea and didn't stop. Now I have Green Tea Necklace and Mint Tea necklace. And a lot of ideas for other kinds of teas:)
Sunday, December 15, 2013
DIY Halloween Haunted Houses
I know that it's a little late to write about Halloween, but I need to show my decorations for this October:)
I found the picture of beautiful haunted houses on Pinterest and loved it immediately. The picture was pinned from Boxwood Clippings blog. I've read DIY Spooky Halloween Houses posting and immediately went to order Paper Mache House set from Hobby Lobby.
I painted them in matte acrylic craft paint, glued some tracing paper inside windows. I have a perfect piece of furniture for them - each shelf smaller than the previous one. I wanted the light inside to be orange or yellow so I used orange Halloween lights. It was one string, plugged in on the bottom, then pushed through shelves up and put in sections inside every house.
These houses are like boxes with roofs as lids. If you put something inside that goes back outside the lids wouldn't close. So I took x-acto knife and cut slits on the back of the houses. The wires went trough these slits and the lids closed properly. My little Japanese salt and pepper shakers played ghosts perfectly:)
Saturday, November 16, 2013
Halloween decorations. Spray painted bottles and jars.
I've collected a little more than a thousand pictures of Halloween decorations and craft on Pinterest. ( Halloween Ideas and Halloween Ideas 2) this year. It was overwhelming - I wanted to make everything from my folders!
I love the idea to paint a bunch of vessels in one color and make a decorative group of them on a mantel. I immediately imagine a group of bottles painted matter black with bizarre antique looking labels on them. My initial plan was to paint them with a sponge brush in craft acrylic. Then I saw a blog post about spray painting and thought - I always wanted to try it! This is a perfect occasion! So I went to Amazon and bought the first black paint I saw :
Rust-Oleum 1905830 Lacquer Spray, Black, 11-Ounce.
Now I knew why I collected all this empty bottles and little jars - they were waiting this day! I washed and dried them thoroughly, took them to the back yard and started painting. The paint was a little thin so I applied it in two or three layers checking against light where there was left transparent spots. I was hooked immediately! It was so easy, so fast and bottles came so glossy and dark deep black!
I also painted some sweet gum pods for putting into an apothecary jar.
Then I thought about putting witch's potions labels on the painted bottles but realized that I liked them as they were. They were so beautiful and glossy and every combination of them was beautiful. So I decided to use them as flower vases.
One spot was near the sofa in the library. The silver plate I bought for Christmas decorations but used for this group of painted bottles with Asiatic lilies and some acorns and leaves.
The second spot was my kitchen window. I always have flowers on it so I can see something beautiful when cooking and washing dishes.
Asiatic lilies are perfect for Halloween - they are angular and graphical and color is beautiful orange with dark spots and splatters.
I looked at bottles at this point and saw something strange!
This is a closeup. The spider was not painted or some kind of a sticker - it's a real spider which came from nowhere and sat at the perfect spot making itself a perfect Halloween touch!
The last bottle went to bright orange charger for table centerpiece. The ghosts figurines are my German friend's gift. The bigger one has a tea light at the bottom and casts bright spots of light around. My dinner table at that time still had all the mess from my decoration projects, sorry :)
Now I'm looking around - what else can be painted? It's such a fun! I've bought already matter black paint and silver paint and I'm eager to start next spraying project.
Wednesday, October 30, 2013
Making Halloween wreath
I saw an Edgar Alan Poe Wreath on pinterest and was immediately hooked. Original project by Gwen Moss was found here.
Tuesday, July 23, 2013
For Ali
Subscribe to:
Comments (Atom)
